|
|
|
How to Advanced Cell Shade
By: HYPERION (hyperionbmw@hotmail.com)
In the tutorial, I will show you how to properly cell shade
a car in Adobe Photoshop. The version I am using is 6.0, it is very close to 7.
I will tell you right off the bat that Photoshop is not the best program to use
to cell shade a car. In all honestly the vector qualities of Illustrator make
for easier paths, and fills, and the way Illustrator handles gradients is much
more advanced then Photoshop. However, much of the knowledge that it requires to
cell shade a car in Photoshop can be applied to Illustrator, so I am doing this
tutorial in Photoshop hoping that the knowledge from it can be applied later as
you become more talented and skilled.
I am also going to go BEYOND Cell Shading, and will incorporate many airbrushing or pixel based effects. I will do this to show you how to spice up a flat image, but if you are going for the more cartooned flat cell shaded look then leave it out. If you want to do simple cell shading this is probably not the best tutorial, but the basics are the same, just use a smaller color pallet, stylize the details of your paths.
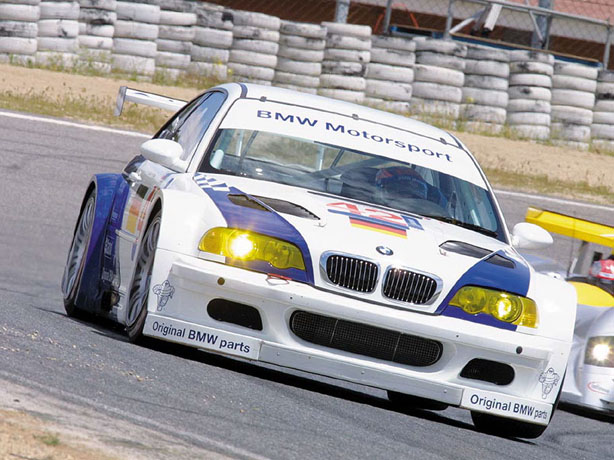
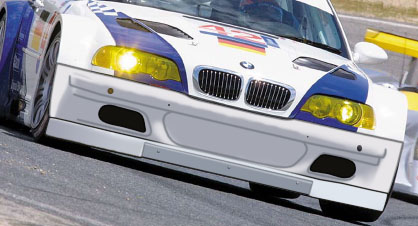
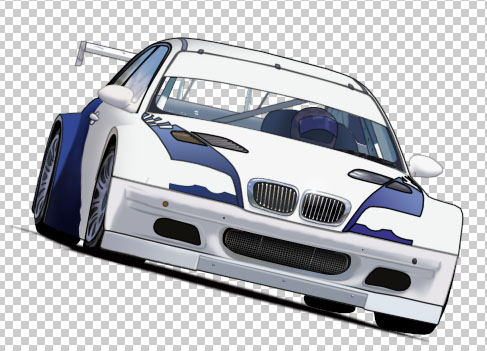
Here is my starting image. Image clarity and size are key factors to think about when choosing an image. Poor resolution will result in fuzziness/pixleation when you are working on fine detail causing you to put points in the wrong location. I chose to use this outstanding high quality photo I found on the net of the BMW Touring car.
First off we need to know the tools we will be working with. The main tool we will use is called the pen tool. There are many different variations of it. There is the Add point, Subtract point, the freehand draw points, and the point Converter. Get to know them all well they will be invaluable later. Keep in mind, you can always edit a point later if need be.

Using the pen tool: To use the pen tool you click to add a point, then hold it and drag out handle bars, these handle bars allow you to make a curve. The curve is called a Bezier curve. The curving action allows you to form smooth and flowing lines that cannot be done any other way in Photoshop or Illustrator.
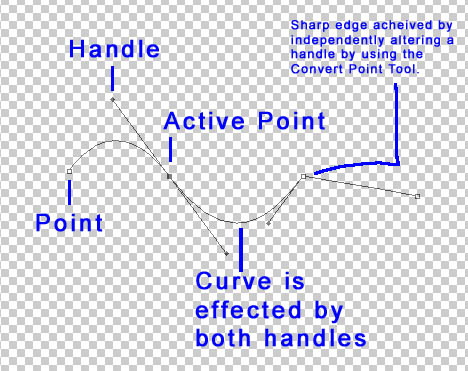
How the path tool works is you draw out a path, and then you can either fill it, stroke it, or use that path as a selection. MAKE SURE YOU ARE ON THE WORK PATH PEN TOOL, and NOT the SHAPE LAYER PEN TOOL. If you are on the Shape Layer Pen Tool it will overlay a solid color using the path as a vector outline.
I will now fill, stroke, and make a selection all
based off of a single path. These actions are selected by right clicking when
the Pen tool is selected.

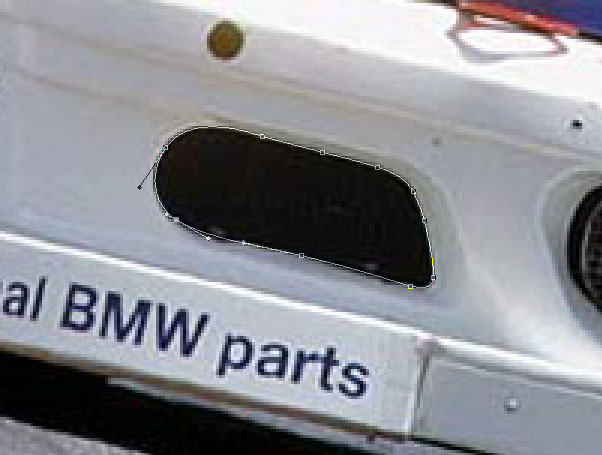
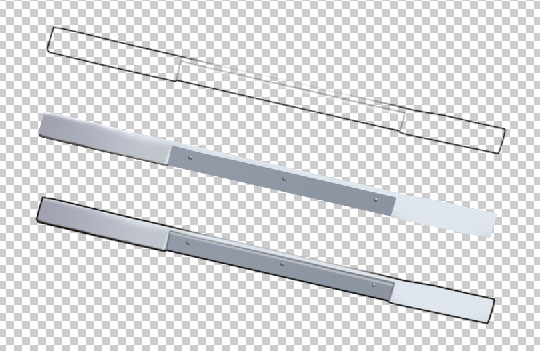
Now it is time to start working on our picture. We will create outlines of detail. We will then stroke the path. This will all be done on a separate layer. Larger detailed objects will get larger brush sizes when we stroke them, finer detail = smaller size brush. Here is the brake duct outlined.
I am going to be using the same path as I am using to
stroke the outline as the one I am using to fill the path, this makes it so I
don’t have to draw everything twice. This is a little confusing and tricky at
first but it is much easier to do. In the next picture I will show you what your
picture should look like properly layered. As you can see the stroke is on top
of the fill. Both are separate layers so I can go back and edit them later if
need be.
Here is the front lip almost finished. I took the liberty of airbrushing it and using some simple gradients to give it a much more realistic feel. If you want the more cartoon look do not airbrush it. I personally like the cartoon look but with a more realistic side.
Here is a picture of the Bumper almost finished. I used a hard black for the outside edge, and then a lighter gray lines for the inside detail. After filling the bumper white I airbrushed on the shadows to give it a 3d appearance. If you want to do a more cartoonish look simply make a path with the pen tool around the shadow, but do not stroke it, simply fill it with the color you want. (I find when making shadow in for Cell Shading that it is easier to fill them entirely black, then to back off the transparency on that layer until it looks visually correct, this also allows any detail to show though. Same goes for highlights)
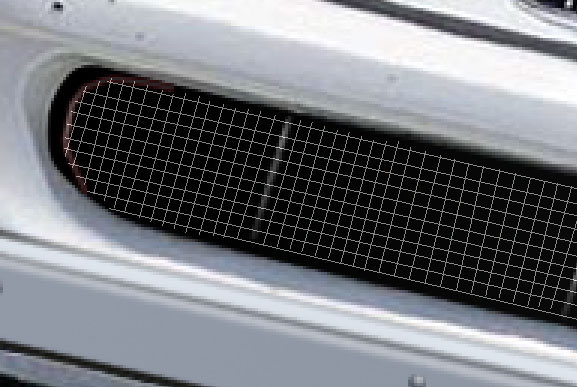
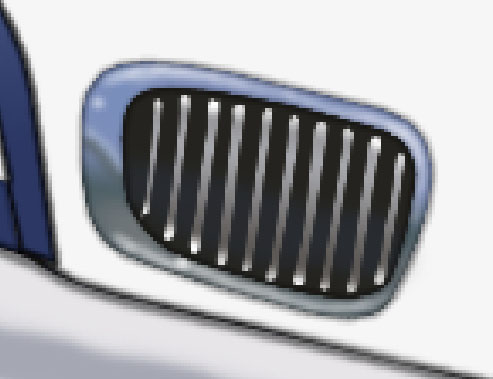
I made the grill by cutting out the black shape. I then filled it with the texture of the mesh. That’s many many many strokes and paths. Here it is the paths for the grill. Not exactly perfect, but when I am done you will not notice the difference. (I ended up stroking this path with a 1px airbrush. I then CTRL clicked on the layer in the layer box to select all active pixels. I then used a black to light gray to black gradient on that selection. I then lowered the opacity on that level to get it to look right.)
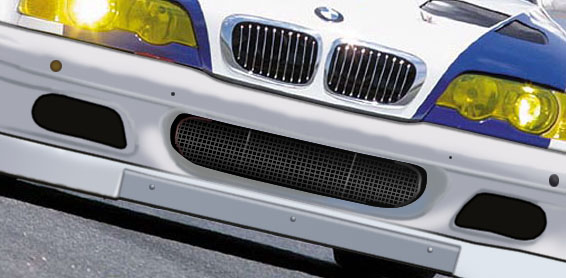
Okay, I am going to jump ahead a lot of steps. Mainly you just continue to do the detail, and stroke and fill and airbrush at your own discretion. Unclose shot of Kidney grill. I airbrushed the fill after I was done so I could get a more realistic look. Same goes for the slats.
Moving right along This is what the front end is starting to look like.
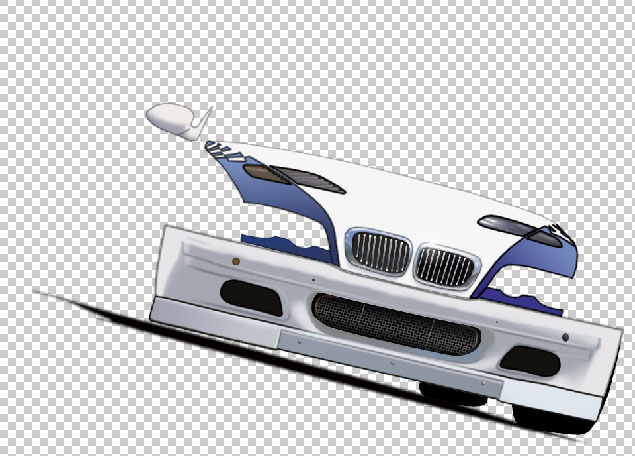
Up till now I have been pretty much just following the shapes of details and objects. Now I am going to really block out a large portion of the car. Its pretty much everything past the rear end. Here is what the shape looks like on its own.

Pieced together.
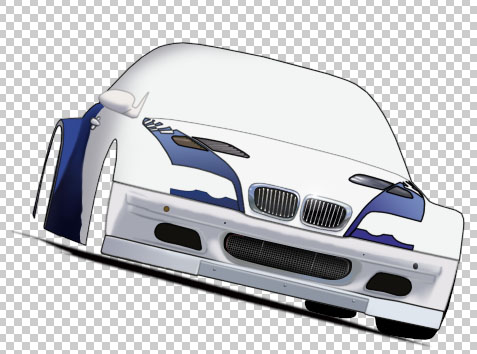
More
And now the basic stuff is done. The main cockpit area and the guy is pretty much all raster hand drawn. I faked the black strokes on him and most of the other stuff on there. You can get away with doing that a little bit on smaller detail.
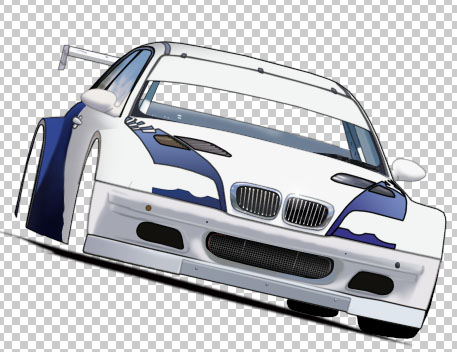
Ok, this is it pretty much done. Now its just the final touches. These touches include some pretty complex and intricate tricks. Most of the logos will be hand drawn. I will later Stroke them via Layer>Layer Styles>Stroke. Also the headlights are not done. They are the hardest objects on the car to do. That is the reason why I saved them for last. I will also do some interesting glass tricks, and perhaps some gloss to the body. So here we go.
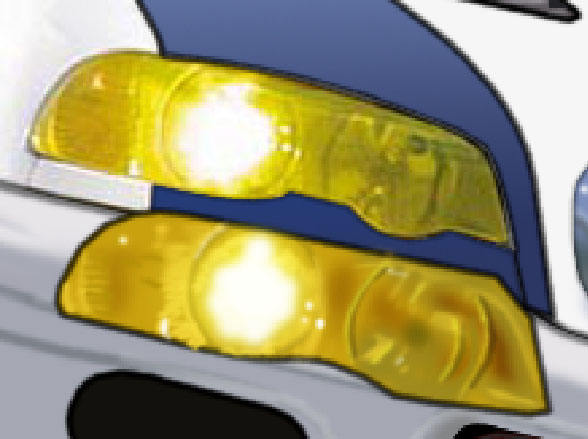
The headlight is entirely raster hand drawn. Its really the only way to get it to look proper or realistic. If you want to do more of a cell shaded look, just drop down to a more basic color pallet and stylize your selections. You can see that the headlight is not quite exact, but unless people are comparing the original and the copy side by side they will not know. Also notice that the headlight is odd shaped. It fits bethind the bumper layer, and also the hood layer so it will look much more natural when in place.
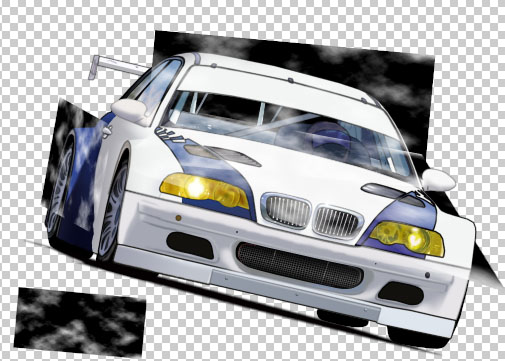
Ok, here is the reflection layers. I selected the colors black and white and used Filter>Render>Clouds. I then bumped up the contrast and dropped the lightness under Image>Adjust>Brightness Contrast. I then duplicated the selection and Free transformed the selection to cover the windshield, hood, and rear tire well. I then set them all to Screen on the Layer Blending Mode Drop Down so that black will turn invisible (it will only be invisible when there is a color behind it). Now I just need to cut them out, and feather them with the eraser tool a bit and they will look fantastic. (the little square off to the lower left is just there to show you what the cloud layer should look like).
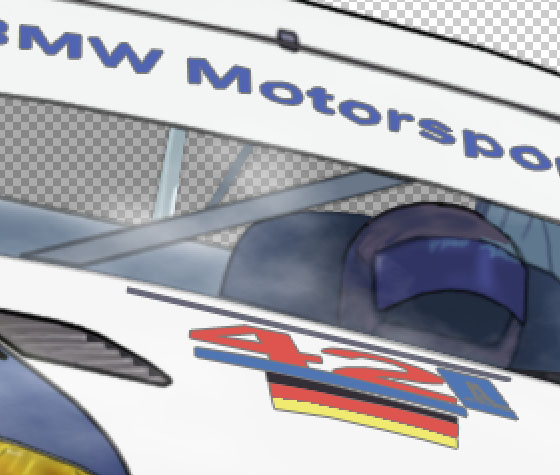
Here is a close up of the logos. I just free handed them all. A lot of the time I used the poly lasso, or another selection tool for help. When finished I stroked the layer via Layer Styles with a 1px black boarder set to 50% transparency.
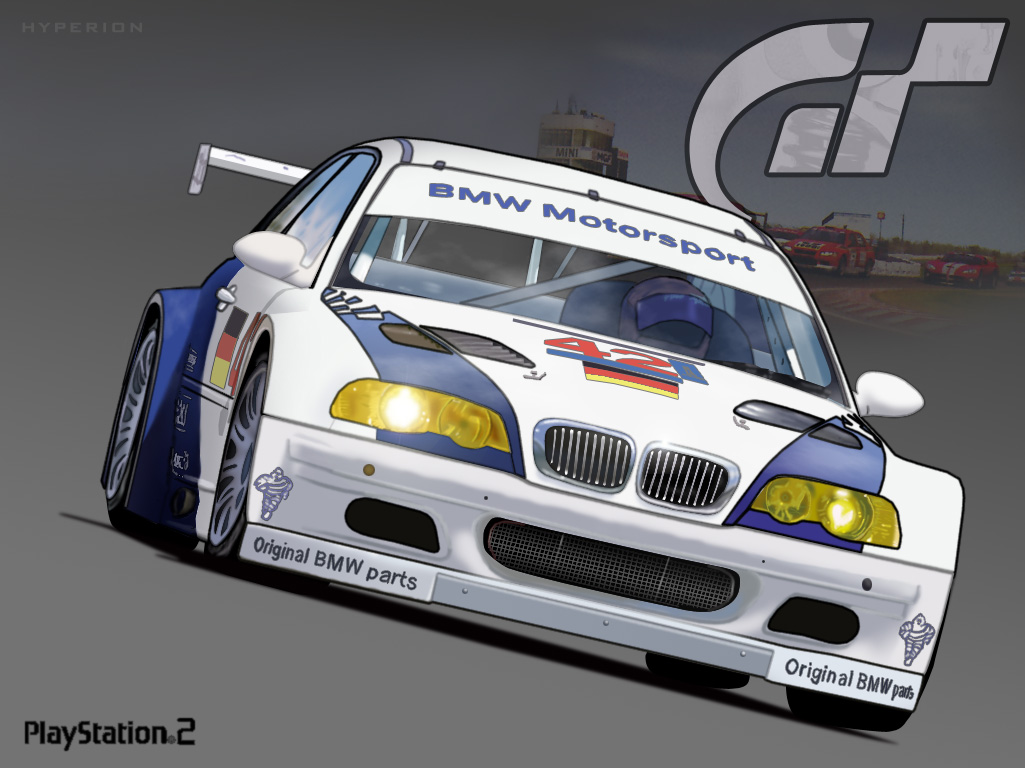
Ok, So now we are pretty much all done. The car is how we want it. Now we just need to find it a background.
I love jokes, and most of my signatures are all just jokes on top of jokes, so I am going to make fun of Gran Turismo and PS2. If you have noticed there is NO GTR or any BMW M3 in GT3 or in GT4. Soooo Since this is Photoshop AKA “the stuff dreams are made of” lets make it happen. I took a pic from the up and coming GT4 and overlaid it over the gradient in the background. The GT logo is in the upper right, I traced it with the pen tool, and PS2 in the lower left to balance the image. All done. TA DA.
Wallpaper:
Sig:
Now I am probably going to have to put up with tons of peoples asking me “Hey, is that true that the BMW GTR is going to be in GT4???” I guess that’s the consequences of not sucking at Photoshop.